Installing cable railings is relatively easy for anyone with decent carpentry skills. To help, we have provided this step by step guide. When compared to installing other railings that are available, Keuka Studio’s railings are typically much easier to install and we have a variety of railing styles to choose from. This is because instead of forcing you to use standard products, we design the railing around your unique project. This is especially important if you have a complex deck with multiple angles, levels or stairs. The result is railing that flows naturally around the entire project. If you have any questions we are here to help, just contact us at 585-487-6148

A step by step guide is provided here including what tools you will need, how to set the posts, what posts to set first, and how to install the top rail.
Tools Required
- Drill
- Drill Bits
- Level
- Measuring Tape
- Pencil
- Masonry String
- Socket Set
- Keuka Cable Installation Kit
STEP 1 – Familiarize Yourself with the Drawings
We provide a complete set of drawing with every custom project. Each component will be labeled. Posts are labeled with numbers 1,2,3, etc. Cable assemblies are labeled with letters A,B,C etc.
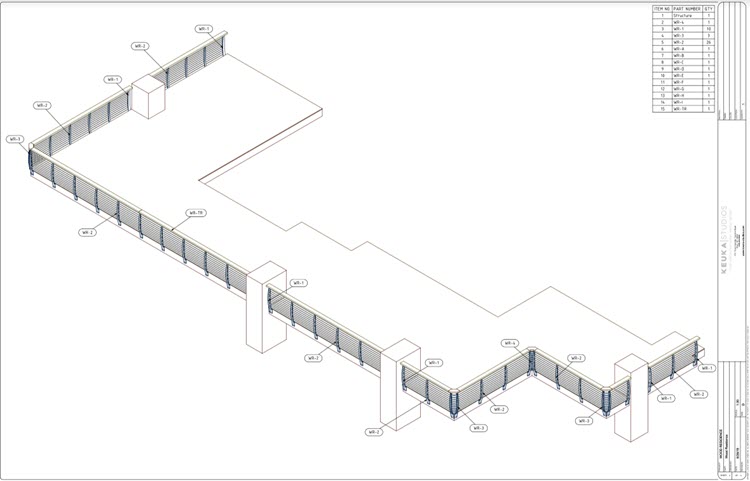
In these drawings, you will also find specific locating dimensions for any posts that have a critical location. Stair posts for example. Please look for these dimensions before placing any posts. Once you have familiarized yourself with the project drawings you are ready to install the cable railings.
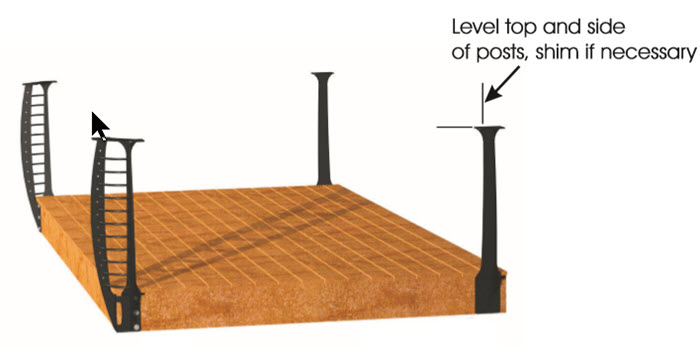
STEP 2 – Set the Corner and End Posts
Using the Lag Bolts provided, bolt-on all corner and end posts. Set the height of the post so that it achieves the required height (36″ or 42″ depending on model). For any post located adjacent to a wall, ensure that there is not more than a 4″ space between the post and the wall. Level top and sides of all posts, shim if necessary. Note: For top-mounted posts, the spacing and installation are similar to fascia mount however, you do not need to adjust for height.
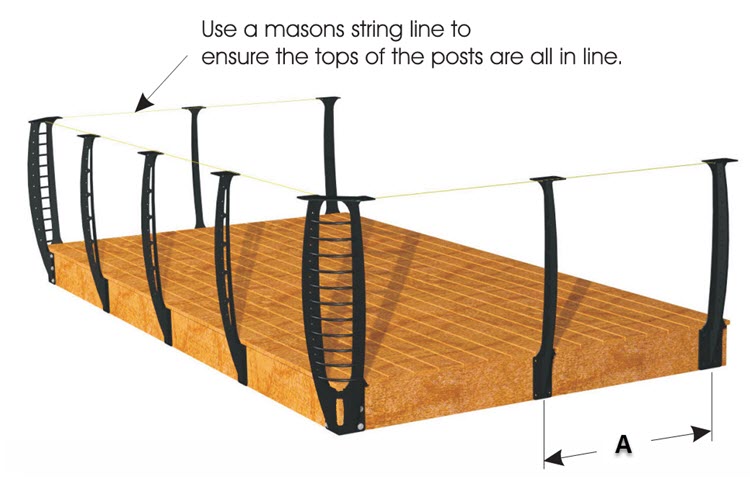
STEP 3 – Set the Intermediate Posts
To determine the location of the intermediate posts (A), measure the distance between end and corners and divide this measurement equally to match the number of posts on the drawings. The posts should be spaced 42 inches to 48 inches maximum (60 inches if using cable spacers).
Use a masons string line to ensure the tops of the posts are all in line, vertically.
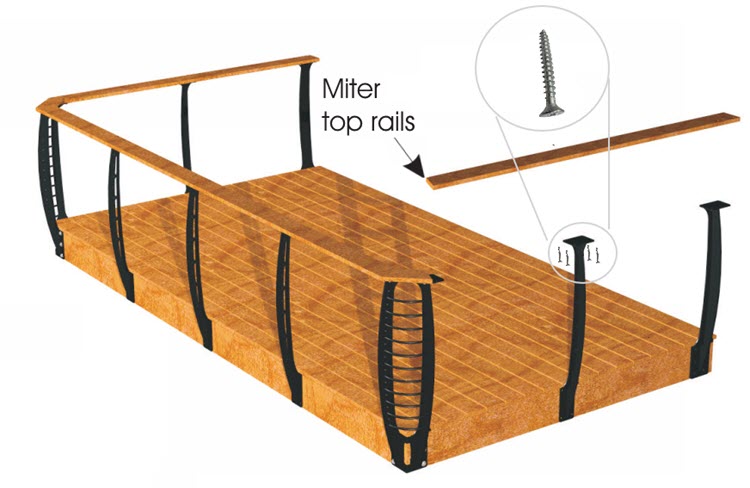
STEP 4 – Install Top Rail
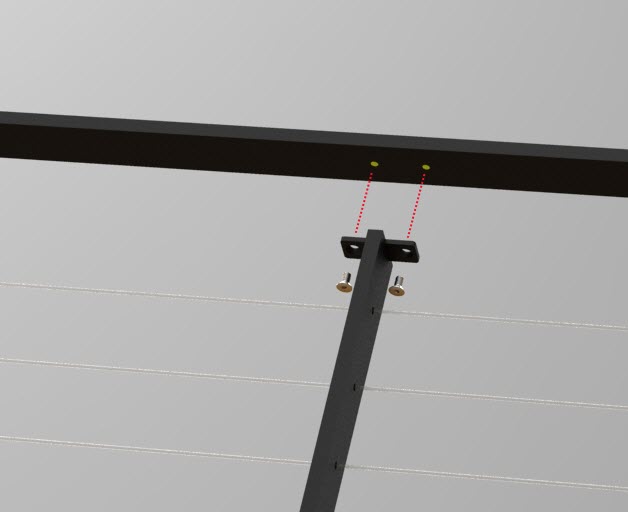
For wood top rails, cut and miter each piece of wood and attach with supplied wood screws from the underside of the railing post top plate.
Note: In instances where a customer is supplying his/her own wood cap, be sure to use a strong, knot-free exterior grade wood like IPE, Garapa, or Tigerwood. Softwoods like cedar or redwood may require a thicker cross-section to avoid bowing.
Aluminum top rails can be cut and mitered with a miter saw (using a metal cutting blade). Top rail can be fastened using the included self-tapping screws (pre-drill first). Additionally, for long runs, ends, and corners, splice plates are included to rigidly join these sections.
How to install splice plates
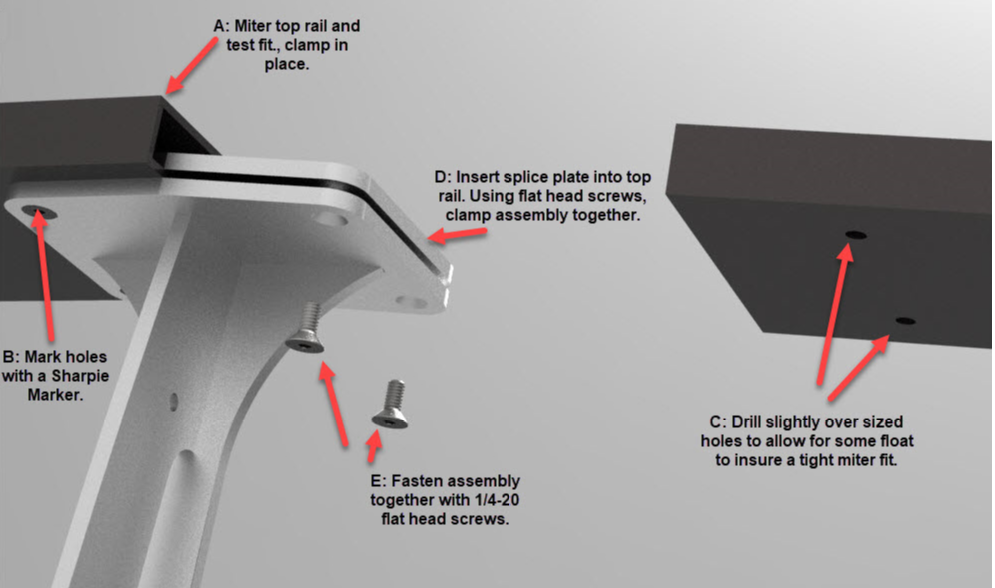
For solid metal top-rails such as these, a special assembly method must be employed. For this type of railing construction, a surface-mounted base is required. The top rail will arrive with tapped holes already in the bottom side of the top rail. Please do not follow the instructions for other types of railings for this style. Each linear section of railing posts must be assembled to the top rail prior to affixing it to the deck. Please consult with our experts prior to starting this type of project.
STEP 5 – Install Cables and Fittings
Once you have the posts and top rail completely installed the railing is ready for the cables and fittings to be installed. Our fittings are easy to install and easy to adjust. For more information on installing our cables and fittings click here

